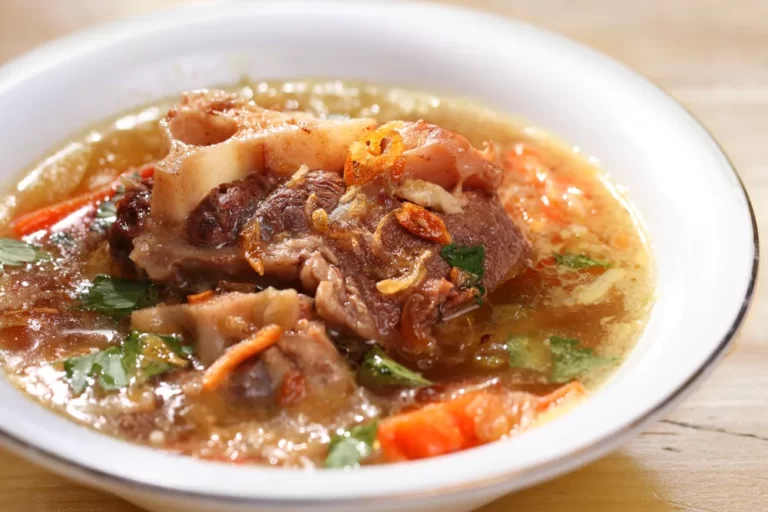
Imagine the tantalizing aroma of a succulent beef roast wafting through your kitchen, the rich, savory flavors dancing on your tongue, and the tender meat melting in your mouth. That’s the culinary delight that awaits you with this remarkable Beef Arm Roast recipe.

This Beef Arm Roast is a true culinary masterpiece, a testament to the power of slow cooking and the simple beauty of classic flavors. Whether you’re hosting a special occasion or simply craving a comforting meal, this recipe is sure to impress and delight. So, gather your ingredients, fire up your oven, and let’s embark on a culinary adventure that will tantalize your taste buds and warm your soul.
I’m here to guide you through the process and share some valuable tips and tricks to ensure your dish turns out perfect every time.
Whether you’re a beginner or have some cooking skills under your belt, this comprehensive guide will provide you with all the information you need to know before diving into the world of beef arm roast recipes.

Beef Arm Roast Recipe
Equipment
- Roasting pan
- Aluminum foil
- Meat thermometer
- Chef’s knife
- Cutting board
- Garlic press (optional)
Ingredients
- 3-4 lbs beef arm roast
- 4 cloves garlic minced
- 2 sprigs fresh rosemary chopped
- 2 tbsp olive oil
- 1 tbsp kosher salt
- 1 tbsp black pepper
- 1 tbsp paprika
- 1 tbsp onion powder
- 1 tbsp garlic powder
Instructions
- Preheat your oven to 325°F.
- In a small bowl, combine the minced garlic, chopped rosemary, and olive oil.
- Rub the garlic and rosemary mixture all over the beef roast, making sure to coat it evenly.
- In another small bowl, combine the kosher salt, black pepper, paprika, onion powder, and garlic powder.
- Sprinkle the seasoning mixture all over the beef roast, making sure to cover all sides.
- Place the beef roast in a roasting pan and cover it with aluminum foil.
- Roast the beef for 3-4 hours, or until the internal temperature reaches 145°F.
- Remove the beef from the oven and let it rest for 10-15 minutes before slicing.
- Slice the beef against the grain and serve it with your favorite sides.
Notes
This Beef Arm Roast recipe is perfect for hosting a family dinner, a holiday gathering, or just looking for a cozy meal to enjoy on a chilly evening.
It’s also a great option for meal prep, as the leftovers can be used for sandwiches, salads, or wraps throughout the week.
Recommended Pairing Drink:
This Beef Arm Roast pairs perfectly with a full-bodied red wine, such as a Cabernet Sauvignon or Merlot. For a non-alcoholic option, try pairing it with a a glass of iced tea.
Recommended Pairing Side Dish:
As for sides, mashed potatoes, provide a creamy, comforting contrast to the hearty beef roast, while roasted vegetables and a crisp salad add a burst of color and freshness.
Useful Tips for best results:

Everything You Need to Know Before Making a Beef Arm Roast Recipe at Home:
What is Beef Arm Roast?
Beef arm roast, also known as a beef chuck roast, is a flavorful cut of meat that comes from the cow’s chuck primal. It’s sometimes referred to as a seven bone roast, arm pot roast, round chuck cut bone, or simply “pot roast.” The smaller version of this cut is called an arm steak.
It’s taken from the front shoulder muscle of the cow and contains connective tissue.
While initially tough, slow cooking methods transform it into tender, flavorful meat.
It is a relatively inexpensive cut, making it a popular choice for home cooks looking to create a hearty and delicious meal. When cooked properly, this cut becomes tender and juicy, making it perfect for slow cooking methods like braising or roasting.
Difference from Similar Cuts:
Beef Arm Roast is a tougher cut of meat compared to other roasts like the tenderloin or rib roast. It has more connective tissue and muscle fibers, which makes it perfect for slow cooking methods.
Beef arm roast is similar to other cuts from the chuck area, such as chuck eye roast and 7-bone roast.
It differs from cuts like sirloin or rib roast in terms of location on the animal, fat content, and ideal cooking methods.
Compared to sirloin or rib roasts, beef arm roast is more affordable and benefits from longer, slower cooking to break down its connective tissue and tenderize the meat.
It is also less fatty than Chuck Roast and has a more intense flavor.

Choosing the Right Cut
When purchasing a beef arm roast, it’s important to choose the right cut. Look for a roast that is well-marbled with fat, as this will add flavor and tenderness to the meat. The meat should also be a deep red color, indicating freshness. If possible, opt for grass-fed beef, as it tends to have a richer flavor and is more environmentally friendly.

Replacement cuts:
If you can’t find Beef Arm Roast, you can substitute it with other cuts from the shoulder area like beef chuck eye roast, 7-bone roast, chuck roast, boneless chuck roast, or beef shoulder steak.
Preparing the Kitchen:
- Calculate Meat Amount: Plan around 1/2 lb raw weight per person for boneless roast. Adjust if there’s a bone.
- Quality Ingredients: Look for dark red, well-marbled beef.
- Equipment: Use a Dutch oven, crock pot, or smoker.
Cooking Steps for Beef Arm Pot Roast:
- Searing: Brown the roast on all sides.
- Slow Cooking: Use your chosen method (Dutch oven, crock pot, or smoker).
- Seasoning: Add herbs, spices, and aromatics.
- Liquid: Include broth, wine, or other flavorful liquids.
Preparation Tips
Before you start cooking, there are a few important preparation steps to keep in mind:
- Allow the meat to come to room temperature before cooking. This will ensure even cooking throughout.
- Season the roast generously with salt and pepper, or your favorite blend of spices, to enhance the flavor.
- Consider marinating the roast overnight to infuse it with additional flavors. A simple marinade of olive oil, garlic, and herbs works wonders.
Cooking Methods:
Beef arm roast is best cooked using slow, moist heat methods such as roasting or braising.
Roasting in the oven at a low temperature for an extended period helps break down the tough fibers and connective tissue, resulting in a tender and flavorful roast.
Braising involves searing the meat, then cooking it in a small amount of liquid at low heat for an extended period, further enhancing its tenderness and taste.
1-Braising:
Braising involves searing the roast on all sides in a hot pan, then slow cooking it in liquid, such as broth or wine, until it becomes tender. This method results in a flavorful and succulent roast.
2-Oven Roasting:
Oven roasting is a popular method for cooking beef arm roast. Preheat your oven to a moderate temperature, place the roast in a roasting pan, and cook until it reaches your desired level of doneness. Remember to let the roast rest for a few minutes before slicing to allow the juices to redistribute.
3-Slow Cooker:
If you prefer a hands-off approach, the slow cooker is your best friend. Simply place the seasoned roast in the slow cooker, add your choice of liquid and aromatics, and cook on low heat for several hours. The result will be a tender and flavorful roast that falls apart with a fork.
Nutritional information:
Beef Arm Roast is a good source of protein, providing about 22 grams per 3-ounce serving.
It also contains important nutrients like iron, zinc, and B vitamins.
However, it is also higher in fat compared to leaner cuts of meat, so it’s important to trim any excess fat before cooking.

Serving Suggestions:
Once your beef arm roast is cooked to perfection, it’s time to think about how to serve it. Here are a few ideas:
- Shred with forks and serve over egg noodles or with mashed potatoes.
- Pair with a crusty loaf of bread.
- Create a hearty stew with baby potatoes.
- Slice the roast and serve it with roasted vegetables for a classic and comforting meal.
- Shred the meat and use it as a filling for tacos, sandwiches, or sliders. Top with your favorite condiments for a delicious twist.
- Pair the roast with mashed potatoes or creamy polenta for a hearty and satisfying dinner.
FAQs:
What is the difference between a beef arm roast and a beef chuck roast?
A beef arm roast comes from the shoulder of the cow, while a beef chuck roast comes from the front shoulder. Both cuts are similar in texture and flavor, but the beef arm roast is typically leaner and more tender.
Can I use a different cut of beef for this recipe?
Yes, you can use a different cut of beef for this recipe, such as a beef chuck roast or a beef round roast. However, keep in mind that the cooking time may vary depending on the size and thickness of the roast.
Can I make this recipe in a slow cooker?
Yes, you can make this recipe in a slow cooker. Simply follow the recipe instructions for seasoning the beef, then place it in the slow cooker and cook on low for 4-6 hours or on high for 2-4 hours.
How long does Beef Arm Roast take to cook?
The cooking time for Beef Arm Roast will depend on the method of cooking and the size of the roast. Generally, it can take anywhere from 2-6 hours to cook in a slow cooker or oven, and 1-2 hours to cook on the stovetop.
Can I cook Beef Arm Roast in a pressure cooker?
Yes, you can cook Beef Arm Roast in a pressure cooker. It will significantly reduce the cooking time, usually taking around 30-45 minutes.
What is the best way to tenderize Beef Arm Roast?
The best way to tenderize Beef Arm Roast is to cook it low and slow using a slow cooker or braising liquid. This will help break down the connective tissue and make the meat tender and flavorful.
Can I freeze Beef Arm Roast?
Yes, you can freeze beef roast. Let the roast cool completely before freezing it. Wrap it tightly in plastic wrap, then place it in a freezer-safe container. Frozen beef roast will last for up to 3 months. To thaw, simply place it in the refrigerator overnight.
It’s a great option for meal prep or for when you have a large batch of meat that you won’t be able to use right away.
How do I reheat Beef Arm Roast?
Beef Arm Roast can be reheated in the oven, slow cooker, or on the stovetop. Simply heat the meat until it’s warmed through, being careful not to overcook it.
How do I trim Arm Roast?
To trim Arm Roast, it is important to remove any excess fat and silver skin from the roast. This can be done using a sharp knife.
How do I season Arm Roast?
Arm Roast can be seasoned with salt, pepper, and any other desired seasonings. It is important to season the roast well to enhance its flavor.
How do I check the internal temperature of Arm Roast?
The internal temperature of Arm Roast can be checked using a meat thermometer.
What if my beef roast is still tough after braising?
If your beef roast is still tough after braising, there are a few things you can do:
1- Allow the roast to rest for an additional 15-20 minutes before slicing. During this time, the juices will redistribute throughout the meat, making it more tender.
2- Add more liquid to the braising liquid. This will help to keep the meat moist and tender as it cooks.
3-Shred the meat instead of slicing it. This will make it even more tender and easier to eat.
How do I thicken the braising liquid?
If the braising liquid is too thin, you can thicken it by using a cornstarch slurry. Whisk together 1 tablespoon of cornstarch with 2 tablespoons of cold water. Gradually whisk the slurry into the braising liquid while it is simmering. The braising liquid will thicken instantaneously.
How do I store leftover beef roast?
Let the beef roast cool completely before storing it. You can store it in an airtight container in the refrigerator for up to 3 days. To reheat, simply place the roast in a baking dish and cover it with foil. Heat in a preheated oven at 350°F (175°C) for about 20 minutes, or until heated through.
Good-to-Know:
Did you know that beef arm roast is often used to make pot roast, a beloved comfort food dish? The slow cooking process transforms the tough cut of meat into a tender and flavorful masterpiece. Additionally, leftovers from a beef arm roast can be used in various dishes, such as stews, soups, and casseroles, making it a versatile ingredient to have on hand.
Remember, practice makes perfect. Don’t be discouraged if your first attempt doesn’t turn out exactly as planned. Cooking is a learning process, and with each try, you’ll gain more confidence and skill.
Now that you have all the essential information, it’s time to roll up your sleeves and start cooking that beef arm roast. Enjoy the process, experiment with flavors, and most importantly, savor every bite of your delicious creation!
Please share, thank you!